Introduction
Hey, ever held a real M1? Or tried finding proper WW2 boots that don’t fall apart after one muddy weekend?
That’s the problem most reenactors face. You want your US Army kit to look right. You want it to feel close to what soldiers wore between 1941 and 1945. But when you start searching for a US Army helmet M1 or WW2 US Army boots, you hit a wall. Listings look good in photos. Specs are vague. Prices vary a lot.
Then comes the bigger issue. Cheap fakes.
Some helmets use thin metal that dents easily. Some boots use soft leather and modern soles that look wrong. After one field event, straps tear, paint chips, and soles peel. Not only does it waste money, it also ruins the look of your impression.
So what’s the fix?
Stick to facts. Know the original specs. Check weight, material, construction details. Then buy from suppliers that focus on correct reproductions, like paddelaters.com, where specs are clearly listed.
Let’s break it down step by step.
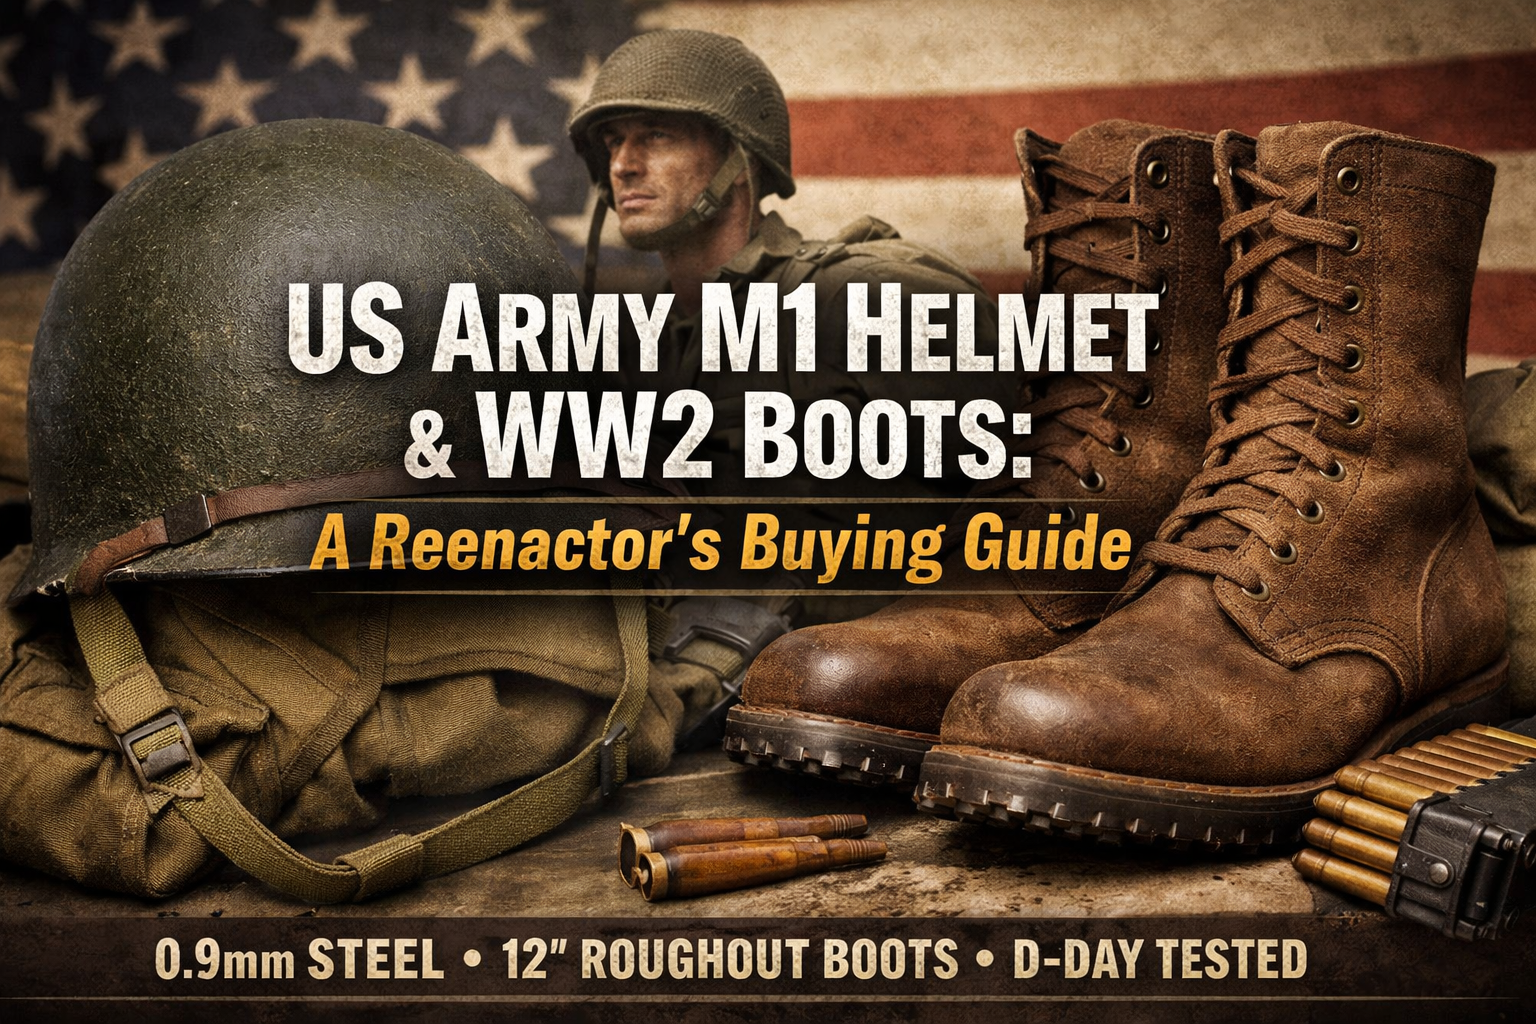
US Army Helmet M1 Breakdown
The US Army helmet M1 was introduced in 1941. It replaced the older M1917 helmet. The new design offered better coverage and improved balance.
Here are the core facts:
-
Introduced: 1941
-
Steel thickness: about 0.9mm
-
Weight: around 2.5 to 3 pounds (shell + liner)
-
Two-piece system: outer steel shell + inner liner
-
Chinstrap: early khaki, later olive drab
The steel shell had a manganese steel composition. It was shaped to protect the sides and back of the head better than earlier helmets. Inside sat a liner made from compressed fiber or high-pressure plastic in later versions. The liner had webbing to adjust fit.
During WW2, millions were produced. It became standard issue for soldiers landing in North Africa, Italy, and during D-Day in 1944.
When looking at reproductions, check:
-
Correct weight range
-
Proper rim seam (front seam for early war)
-
Fixed bales for early models
-
Correct paint texture
If the helmet feels too light, that’s a red flag.
Size/Fit Guide
The M1 helmet was designed as a one-size shell system. Fit came from the liner.
Reproductions should include:
-
Adjustable webbing
-
Sweatband
-
Nape strap
When worn correctly, the helmet should sit level. Not too high. Not tilted back. If it shifts easily when you move, the liner is not properly fitted.
For reenactments, test it with full gear. Move, kneel, run. A good reproduction stays stable.
WW2 Evolution
The M1 changed during the war.
Early war (1941–1943):
-
Front seam rim
-
Fixed chinstrap bales
-
Khaki straps
Mid to late war (1943–1945):
-
Swivel bales
-
Rear seam rim
-
Olive drab straps
If you’re building a 1942 North Africa impression, don’t use a late-war configuration. Details matter. Judges at events notice.
US Army WW2 Boots Close-Up
Now let’s talk about US Army WW2 boots.
Early in the war, soldiers wore service shoes with leggings. Later, the Army introduced improved combat boots.
Common features in WW2 boots:
-
Roughout leather (flesh side out)
-
12-inch height in later combat versions
-
Type II hobnails on soles
-
Sturdy stitching
-
Thick leather uppers
Roughout leather helped reduce shine and required less polishing. It also handled mud better.
The soles often had hobnails for grip. Type II hobnails were spaced for traction without weakening the sole. If your reproduction has modern rubber glued soles with no nails, it won’t look right.
Stitching should be heavy. Double-stitched areas are common on quality replicas.
Type I vs Type III
Type I (early service shoes):
-
Lower cut
-
Worn with canvas leggings
-
Leather sole with hobnails
Type III (late war combat boots):
-
Higher shaft
-
Integrated design, no separate leggings
-
Reinforced heel and toe
If you’re doing a 1941–1942 impression, Type I works. For 1944–1945 European theater, Type III fits better.
Match boots to your helmet period. Consistency builds credibility.
Pros, Cons & Real Stories
Let’s keep it real.
Pros of quality reproductions:
-
Correct weight and feel
-
Durable materials
-
Proper historical look
-
Hold up in field events
Cons:
-
Higher cost than cheap copies
-
Require break-in period (boots)
-
Heavier than modern gear
Now, real stories.
D-Day Event Wins/Fails
At a large D-Day reenactment in Europe, several groups used solid M1 helmet reproductions built to correct 0.9mm steel thickness. After hours in rain and mud, the helmets held shape. Paint showed wear but no major dents.
Meanwhile, a few reenactors brought thin-shell replicas. By day two, edges bent. Chinstrap stitching snapped. It was visible in photos.
Same with boots.
One group used 12-inch roughout reproductions with proper hobnails. They handled mud and uneven ground well. After the event, leather showed wear but remained intact.
Another reenactor wore cheaper boots with glued soles. The sole started separating after repeated wet conditions.
Lesson? Field stress exposes weak gear fast.
If you plan to attend multi-day events, durability matters as much as accuracy.
How to Buy Right
So how do you avoid mistakes?
Here’s a simple checklist when buying from paddelaters.com or similar focused suppliers:
-
Check listed specs. Is steel thickness mentioned? Is leather type clear?
-
Confirm weight range for the helmet.
-
Look for period-correct features (fixed bales, hobnails, roughout leather).
-
Read reviews from reenactors.
-
Ask about sizing charts before ordering boots.
Don’t buy only based on price. A slightly higher investment in a correct reproduction saves money long term.
Also, think about your impression year. Build your kit around a specific timeframe. That helps you choose the right M1 variation and boot type.
Accuracy + durability = strong kit.
FAQs + Wrap-Up
M1 helmet real vs repro?
Originals cost more and may have wear. Repros are safer for field use.
How heavy is an M1 helmet?
Around 2.5–3 pounds with liner.
What leather for WW2 boots?
Roughout leather is common for later war boots.
Are hobnails necessary?
For accurate impressions, yes.
Can I use modern boots?
Not if you want correct WW2 look.
If you’re serious about reenacting or collecting, focus on facts and build your kit with care. Check specs, compare details, and choose quality reproductions from paddelaters.com to get a reliable US Army helmet M1 and WW2 boots that look right and last in the field.
